When you have MySQL database server installed on your computer, you can run and connect to the server using the command line or Terminal.
Several commands that you can use from the command line to manipulate your MySQL server include:
mysqladmin- for performing administrative tasks like creating a databasemysqldump- for producing SQL statements as a backup to restore your databasemysql- for opening a connection through MySQL client shell
When executing commands from the Terminal, you may get a connect to server at 'localhost' failed error as shown below:
$ mysqladmin ping
mysqladmin: connect to server at 'localhost' failed
This post will explain two things you can check to fix the connection error above.
The first thing is to ensure that your MySQL server is actually running.
Check that MySQL server is actually running
When I issue the mysqladmin ping command to check if MySQL server is alive, the full error response from the Terminal is as follows:
$ mysqladmin ping
mysqladmin: connect to server at 'localhost' failed
error: 'Can't connect to local MySQL server through socket '/tmp/mysql.sock''
Check that mysqld is running and that the socket: '/tmp/mysql.sock' exists!
The above error response provides some hint of what you can do to fix it.
The mysql.sock file is a Unix socket file that’s used by MySQL programs to connect to the server.
It’s usually generated when you start the MySQL server, so you shouldn’t need to check if the file exists.
This means you only need to ensure that your MySQL server is actually running (mysqld is the name of MySQL program that listens for connection).
If you’re using Linux or macOS, you should be able to run mysql.server start command as follows:
$ mysql.server start
Starting MySQL
 SUCCESS!
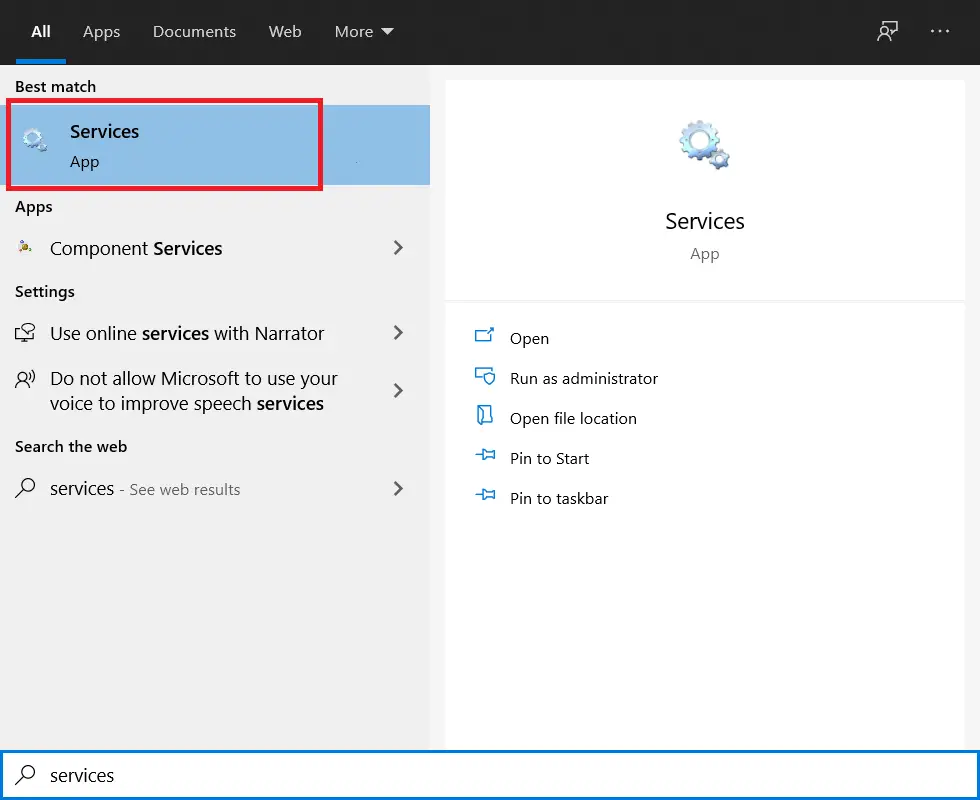
If you’re using Windows, you need to ensure that MySQL service is running on your computer.
First, open the Start menu and search for the Services panel:
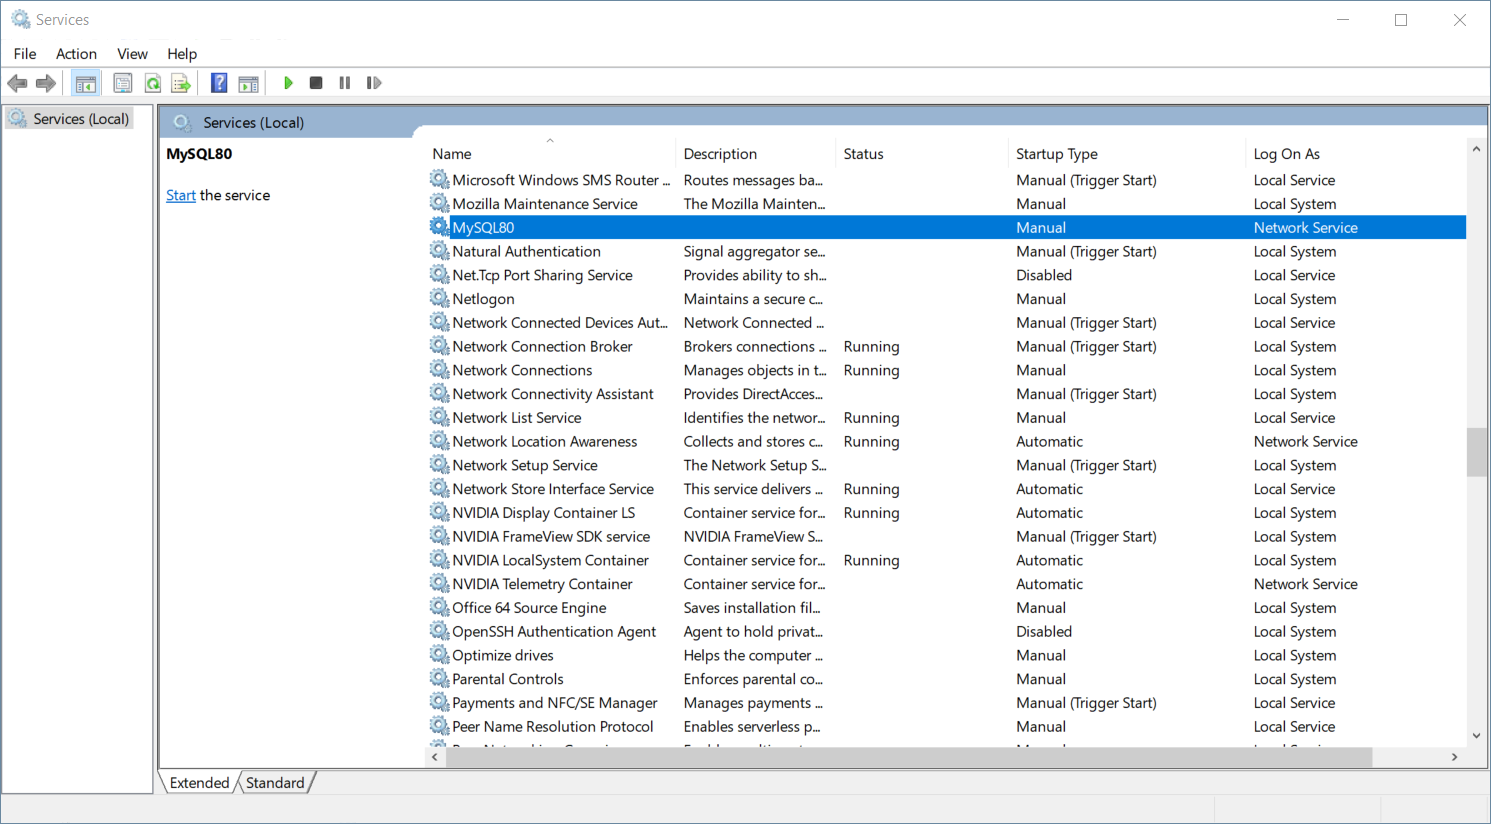
Once you’re in the Services window, scroll through the services list and look for the one named MySQL
Usually, you have the MySQL version number attached to the service name.
The MySQL version installed on my computer is MySQL 8.0.26 so I have MySQL80 service listed as shown below:
Once you get the service running, you should be able to connect to the server.
Make sure you’re using the correct user and password
Sometimes you may also get a connect to server at 'localhost' failed with the following output:
$ mysqladmin ping -uroot
mysqladmin: connect to server at 'localhost' failed
error: 'Access denied for user 'root'@'localhost' (using password: NO)'
The Access denied error above is because I also need to include the password for the user root in the command.
If you have the same error, then you need to include the password with the --password or -p option as follows:
$ mysqladmin ping -uroot -proot
mysqld is alive
To hide the password from being visible on the screen, you can pass the -p option without any parameter as follows:
mysqladmin ping -uroot -p
MySQL will then prompt you to enter the password on the next line:
$ mysqladmin ping -uroot -p
Enter password:
mysqld is alive
Now you should be able to connect to the server from the Terminal.
And those are the two things you can do to fix the connect to server at 'localhost' failed error.

