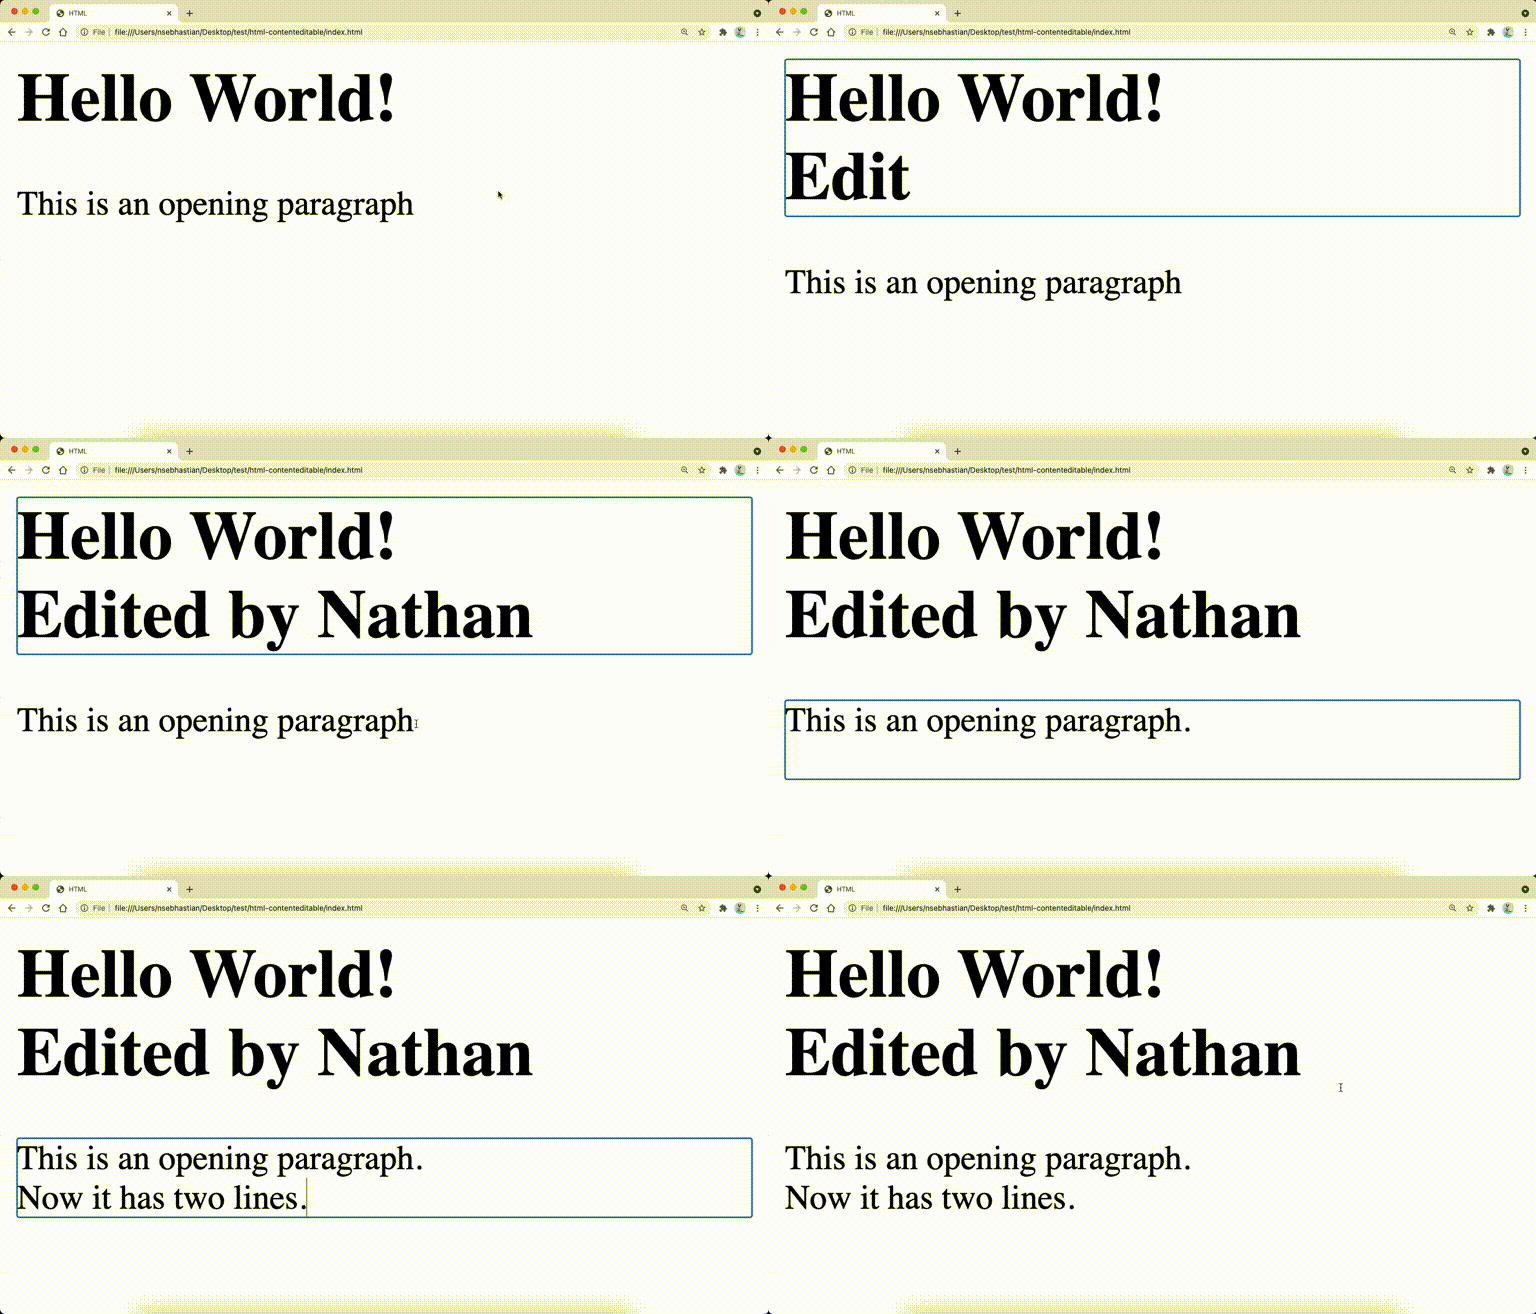
The HTML contenteditable attribute is used to make your HTML tags content editable. Setting the attribute allows you to click on any HTML content rendered on the browser and edit it.
For example, here’s how to make <h1> and <p> tags content editables:
<body>
  <h1 contenteditable="true">Hello World!</h1>
  <p contenteditable="true">This is an opening paragraph</p>
</body>
When you open the HTML page on the browser, you can click on the <h1> content and change it:
The changes that I made above produces the following HTML <body> content:
<body>
  <h1 contenteditable="true">
    Hello World!
    <div>Edited by Nathan</div>
  </h1>
  <p contenteditable="true">
    This is an opening paragraph.
    <div>Now it has two lines.</div>
  </p>
</body>
The contenteditable attribute can be inserted into any valid HTML element, even the <body> tag.
Now although you can add the attribute to the <head> tag, you can’t edit the content of the <head> tag because it’s not visible on the browser. To edit the content, you need to be able to click it.
Also, keep in mind that the edited content is not saved inside the value attribute like in <input> tags.
The value of your contenteditable element needs to be retrieved by using either innerHTML or innerText property.
When you retrieve the content using innerHTML, the new HTML tags generated from your changes will be preserved:
document.querySelector("h1").innerHTML
// "Hello World!<div>Edited by Nathan</div>"
When you use the innerText property, the tags will be replaced with the keystroke value.
The <div> tag above will be replaced with a newline \n character:
document.querySelector("h1").innerText
// "Hello World!\nEdited by Nathan"
The contenteditable attribute accepts either true or false as its value.
The attribute value is true by default, so you can write the attribute without assigning any value to make it editable:
<body>
  <h1 contenteditable>Hello World!</h1>
  <p contenteditable>This is an opening paragraph</p>
</body>
Both elements above will be editable when you open the page from the browser.
Finally, you can also style the editable text bold or italic by using the CTRL+B or CTRL+I shortcut on Windows and CMD+B or CMD+I shortcut on MacOS.
Listening to contenteditable element change event
If you need to listen for a change event when the user clicks and edit your contenteditable element, you can use the JavaScript addEventListener() method and listen to the input event.
The following shows how to listen to changes in the <h1> tag content:
<body>
  <h1 contenteditable id="editableHeader">Hello World!</h1>
  <p contenteditable>This is an opening paragraph</p>
  <script>
    let header = document.getElementById("editableHeader");
    header.addEventListener("input", function(event){
      console.log("Header content changed");
      console.log(header.innerHTML);
    })
  </script>
</body>
Now each time the content of the <h1> tag above changed, the innerHTML value of the element will be logged to the browser console.
And that’s how the contenteditable attribute works 😉
