The Android TextView widget is used to display text in your application.
When you have a text that’s longer than one line, then the TextView will automatically put the text in multiple lines.
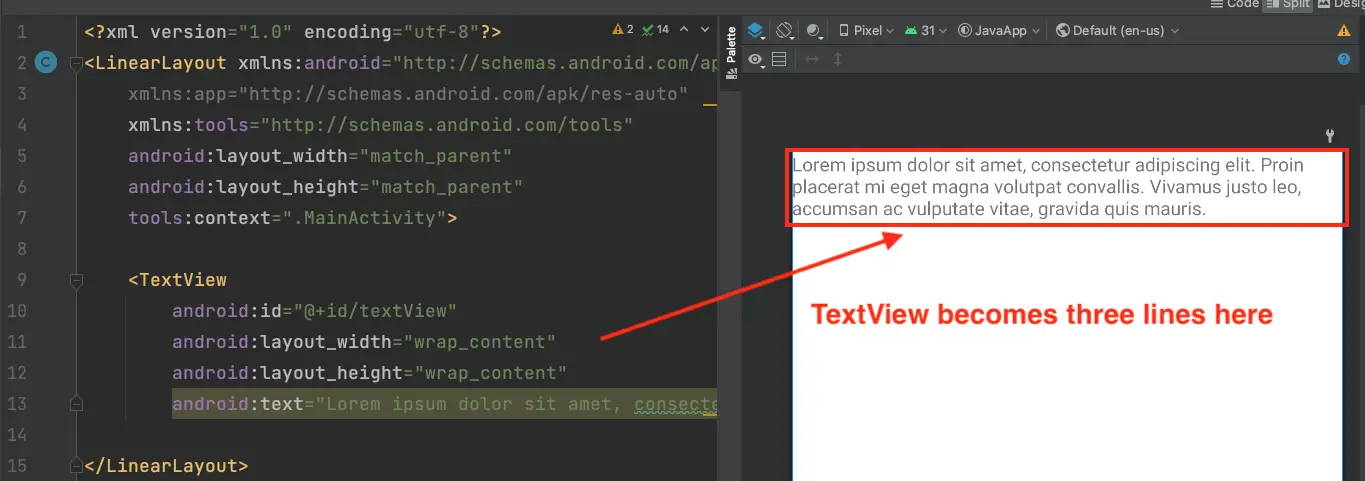
For example, suppose you have a LinearLayout with a long TextView text as follows:
<LinearLayout xmlns:android="http://schemas.android.com/apk/res/android"
    xmlns:app="http://schemas.android.com/apk/res-auto"
    xmlns:tools="http://schemas.android.com/tools"
    android:layout_width="match_parent"
    android:layout_height="match_parent"
    tools:context=".MainActivity">

    <TextView
        android:layout_width="wrap_content"
        android:layout_height="wrap_content"
        android:text="Lorem ipsum dolor sit amet, consectetur adipiscing elit. Proin placerat mi eget magna volutpat convallis. Vivamus justo leo, accumsan ac vulputate vitae, gravida quis mauris." />

</LinearLayout>
Then Android will automatically stretch the TextView to display the text as shown below:
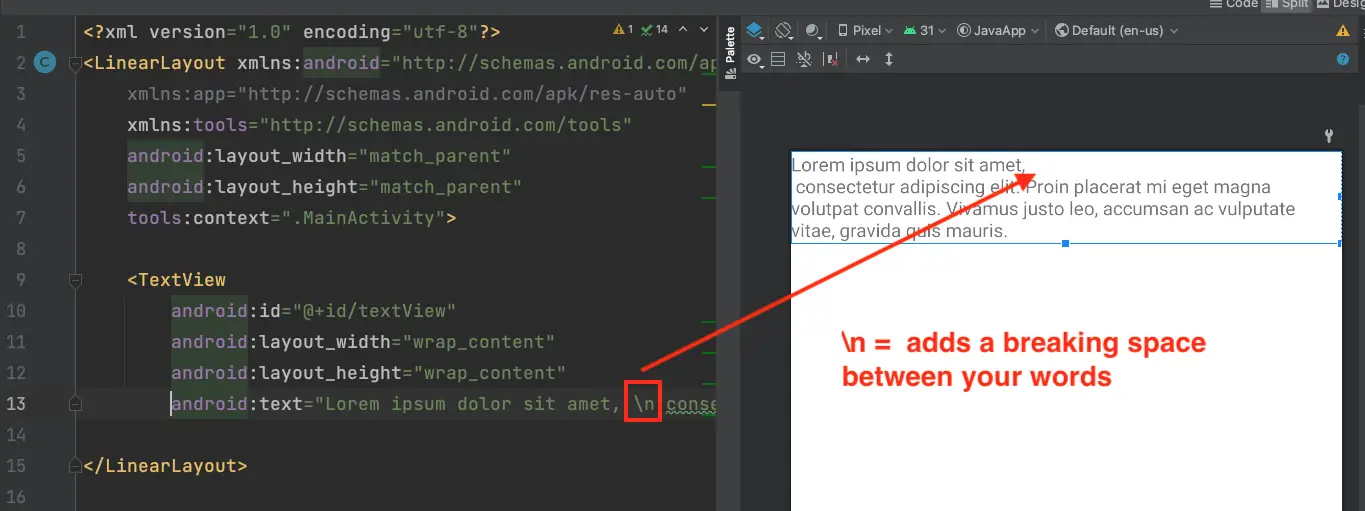
You can also manually add a breaking space by adding the \n syntax in your text as follows:
When you set the layout_width and layout_height as wrap_content or match_parent, then the TextView widget will use all the available space to display the text you specified as its content.
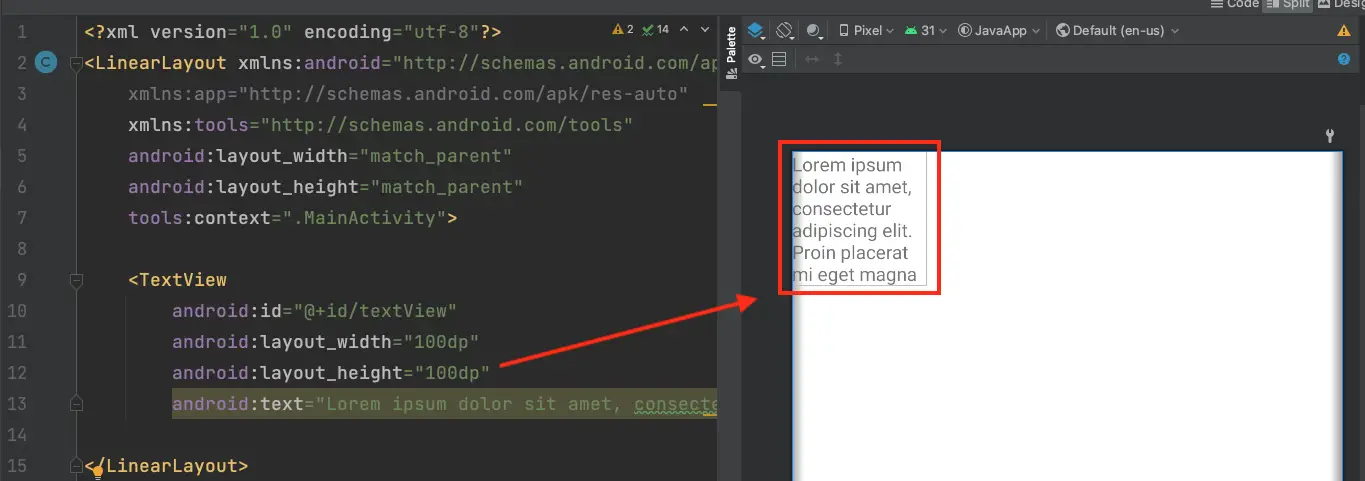
The exception to this is if you set a specific value for the widget’s layout_width and layout_height attributes. The TextView will not stretch to include all the text.
For example, setting the width and height as shown below:
<TextView
    android:layout_width="100dp"
    android:layout_height="100dp"
    android:text="..." />
Will produce the following output:
The fixed width and height will cause the TextView to truncate the text short and display a portion of the text in the fixed area.
Controlling TextView multiline behavior
There are three Android attributes that you can use to help you set the TextView behavior for a text that stretches multiple lines:
maxLinesminLines- And
ellipsizeattributes.
The maxLines attribute is used to set the maximum line a TextView widget can have.
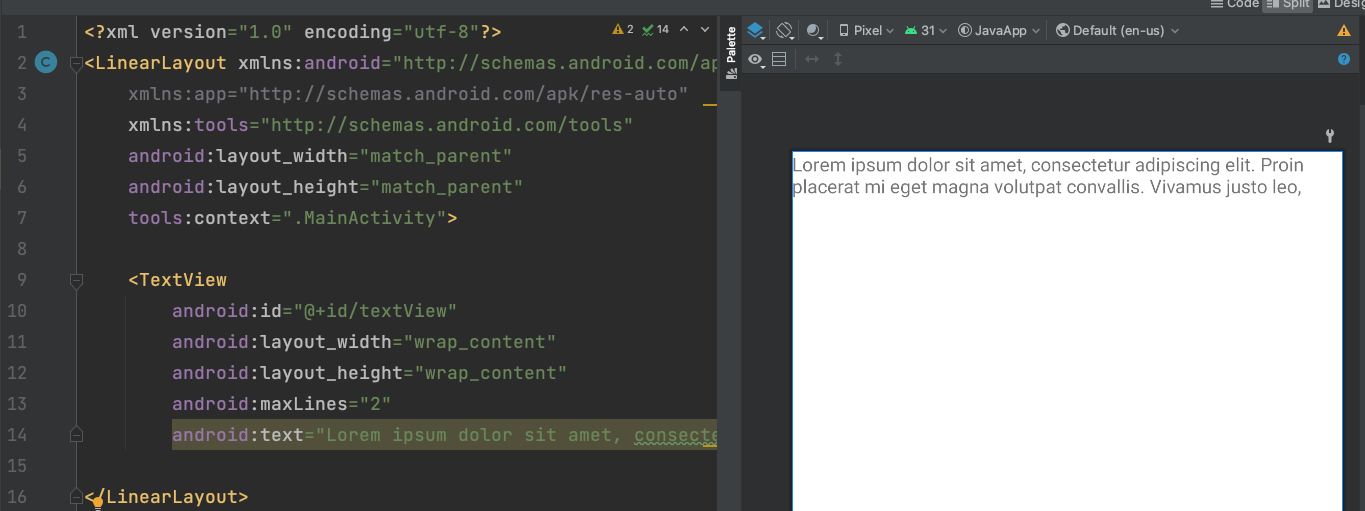
When you set the maxLines attribute as 2:
 <TextView
    android:layout_width="wrap_content"
    android:layout_height="wrap_content"
    android:maxLines="2"
    android:text="..." />
Then the TextView will truncate the text when the second line has been filled as shown below:
You can prevent the TextView from creating multiple lines by setting the maxLines value as 1.
When you use the maxLines attribute, the full text of your TextView will be truncated, leaving a gap that may cause confusion.
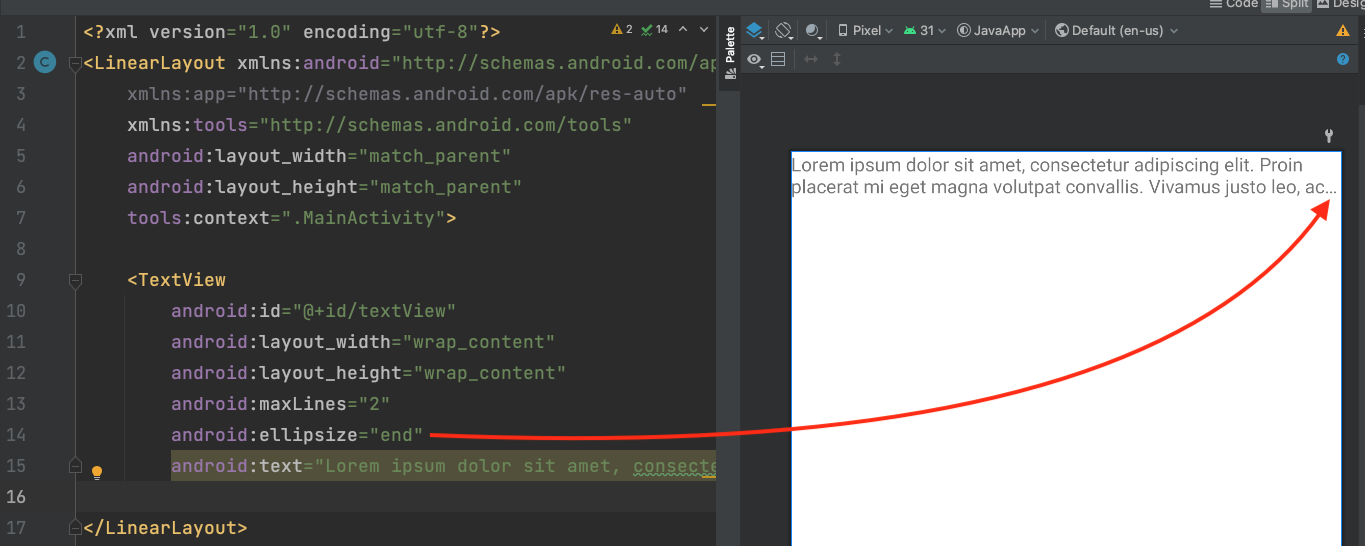
The ellipsize attribute can be used to add three trailing dots (...) by the end of your text. This will be an indicator letting people know that the text is not complete.
Set the ellipsize attribute with end value as shown below:
 <TextView
    android:layout_width="wrap_content"
    android:layout_height="wrap_content"
    android:maxLines="2"
    android:ellipsize="end"
    android:text="..." />
And you will see the following output:
Finally, you can also use the minLines attribute to set the minimum lines a TextView must have.
Let’s see an example of the minLines attribute in action.
Suppose you have three TextView widgets in a LinearLayout defined as follows:
<LinearLayout xmlns:android="http://schemas.android.com/apk/res/android"
    xmlns:tools="http://schemas.android.com/tools"
    android:orientation="vertical"
    android:layout_width="match_parent"
    android:layout_height="match_parent"
    tools:context=".MainActivity">

    <TextView
        android:layout_width="match_parent"
        android:layout_height="wrap_content"
        android:minLines="3"
        android:background="#D2F8DF"
        android:text="Text one \nText two"/>
    <TextView
        android:layout_width="match_parent"
        android:layout_height="wrap_content"
        android:minLines="2"
        android:background="#C5EAFA"
        android:text="Text one \nText two"/>
    <TextView
        android:layout_width="match_parent"
        android:layout_height="wrap_content"
        android:minLines="1"
        android:background="#FDEAFD"
        android:text="Text one \nText two"/>
</LinearLayout>
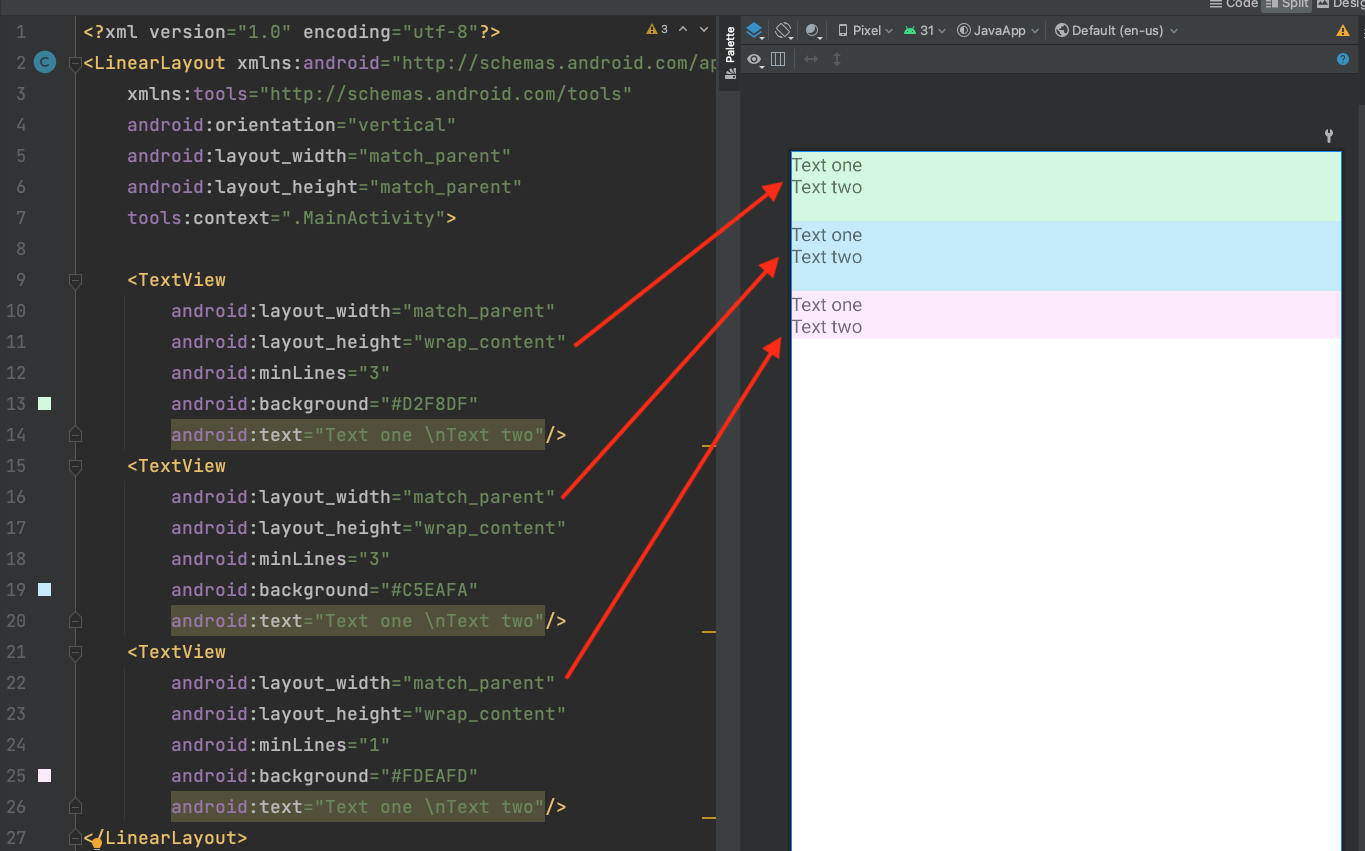
The above layout will generate the following output:
As you can see, the minLines will cause the TextView to be at least as tall as the attribute’s value.
When your text uses less area to display, the TextView will leave an empty gap as shown at the top TextView widget.
The middle TextView content is exactly two lines, so the entire TextView space is occupied.
The bottom TextView shows that when your text have more lines than the minLines attribute, then the widget will stretch to accommodate your text.
Now you’ve learned how the TextView Android widget can be used to display text in multiple lines.
You’ve also learned how to use the maxLines, ellipsize, and minLines attributes to control the behavior of the TextView widget. Good work! 👍
